On your Canvas dashboard, your courses are represented by tiles that have the name of your course and a colored box. The color in the box is the same color that will represent that course on your course calendar. You can edit your course tiles by adding a nickname, changing the color, or adding an image. Below, you'll find instructions for making changes to your course tiles. Some of the changes are purely aesthetic, but others can be very useful.
Add a Course Nickname
Each Course Tile will show you the official name of the course. At Davidson-Davie, courses are named according to a specific naming convention that includes the course ID, section number, modality, campus if applicable, and semester. This information can be difficult to parse at a glance. A Course Nickname can assist you to keep track of the courses you choose to keep visible and organized on your dashboard.
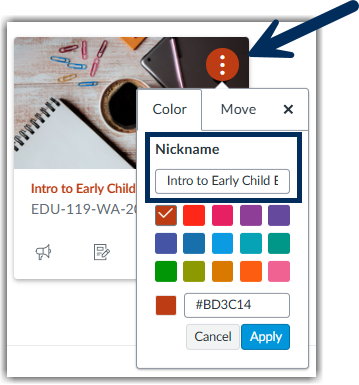
To give your course a nickname, click the three vertical dots in the upper right corner of the tile and enter the new name in the "Nickname box.
You will see the nickname written above the course name on the tile in the color that Canvas has assigned the course.
Change the color of your Course card
Canvas randomly assigns your course a color that will represent the course on your Canvas calendar. If you would like to change the color for aesthetic or accessibility reasons, click the three vertical dots on the card and you'll see a palette of colors. Whatever color you pick is just for you. Every user can customize his or her own colors. (Need more colors? Check out color-hex and type the hex number into the box.)

Apply an image to your Course card
The default appearance of a course tile is a colored box and the name of the course. If you want to make it more visually engaging or make it quickly recognizable, you can add an image to apply to the course card that will show to everyone enrolled in the course. To do this, follow these directions:
- Go into the course by clicking on the course tile in your dashboard.
- Scroll down the navigation links until you see "Settings". This will open your course settings.
- You can navigate the course settings menus at the top of the page but the first page of options is "Course Details" and the first item at the top of the page is where you can add an image by clicking "Choose Image".
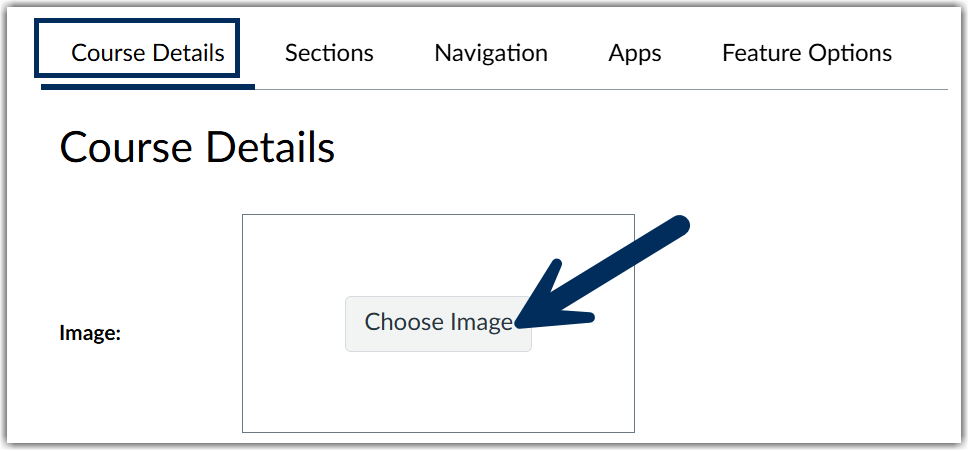
- Upload your image and save by clicking "Update Course Details" at the bottom of the screen.
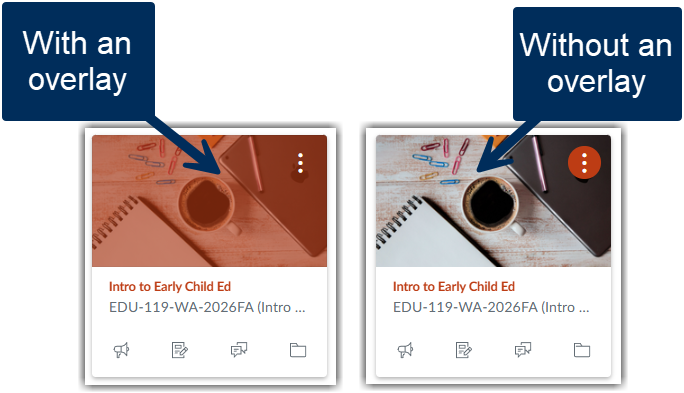
Remove the Color Overlay from your image
Canvas automatically adds a color to your Canvas courses so that they can be represented on the calendar. If you add an image to your card, the color is superimposed on the image. If you don't want the image to look "hazy" because the color is overlaying it, click the three dots on your Dashboard and unselect "Color Overlay".  The course color will appear as a circle around the three dots on the card rather than an overlay.