TABLE OF CONTENTS
- Introduction
- Add Prerequisites to a Module
- Add Requirements to a Module
- Lock Modules until a Specific Date
Introduction
You can set the pace of your course by using Canvas’ prerequisites settings and lock settings.
Likewise, you can control how a student navigates through your module by creating requirement settings for your content. Though this may seem like you are limiting a student, using Canvas’ requirement settings can reduce cognitive overload and increase transparency for your students, making your expectations clear for what they must do to successfully complete a module before moving on to new content.
Add Prerequisites to a Module
The prerequisites feature pertains to the module as a whole. The module will remain locked until a student completes the required items in the previous module. Therefore, you must make sure you have already added a module to your course before you set a prerequisite for a new module.
Locate the name of the module:
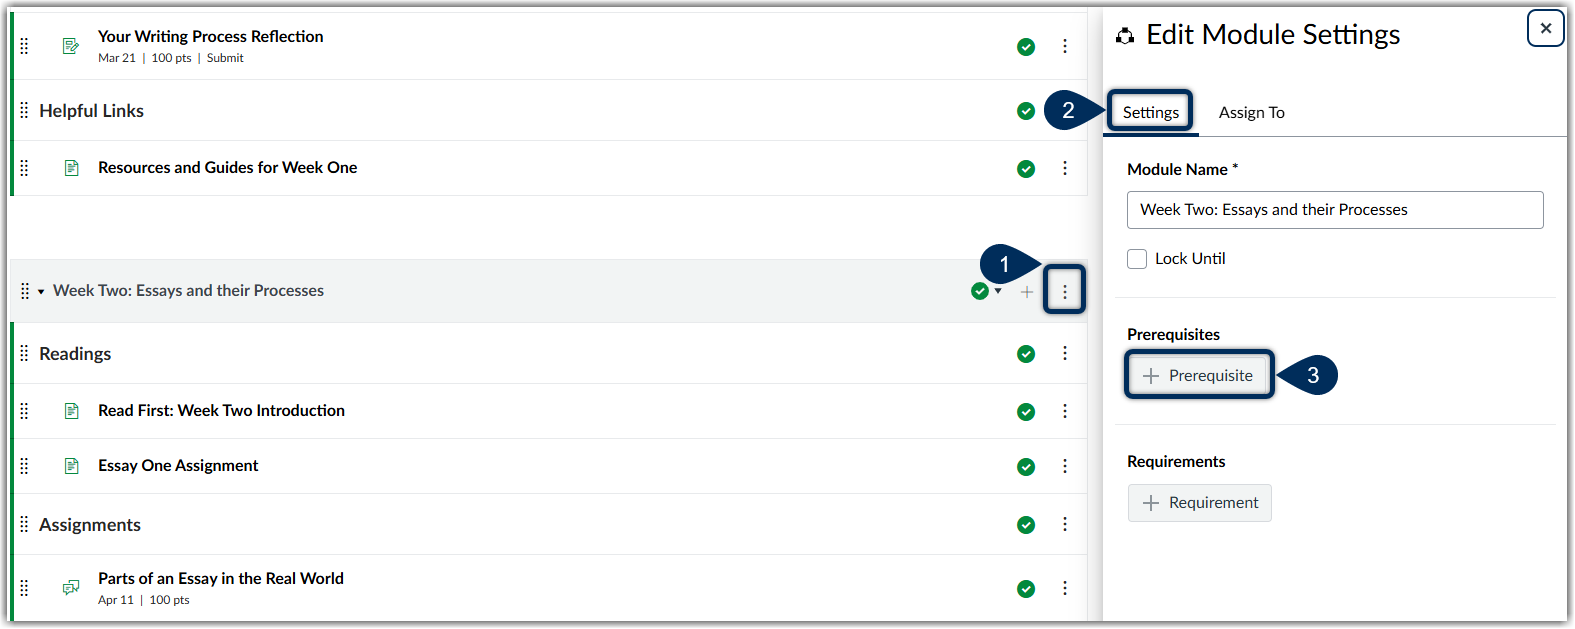
- Click the Options icon (marker 1)
- Select the Edit link
- From the Edit Module Settings tab (marker 2), click on the button to add a prerequisite (marker 3). A drop-down menu will appear for every module currently in your course.
- Select the module students must complete before moving on.
- Optional: To add additional prerequisites, click the Add Prerequisite button. If you want to ensure students complete modules in order, you should add prerequisites for all modules that come before this module.
- Optional: To remove a prerequisite, click the Remove icon.
- Save changes
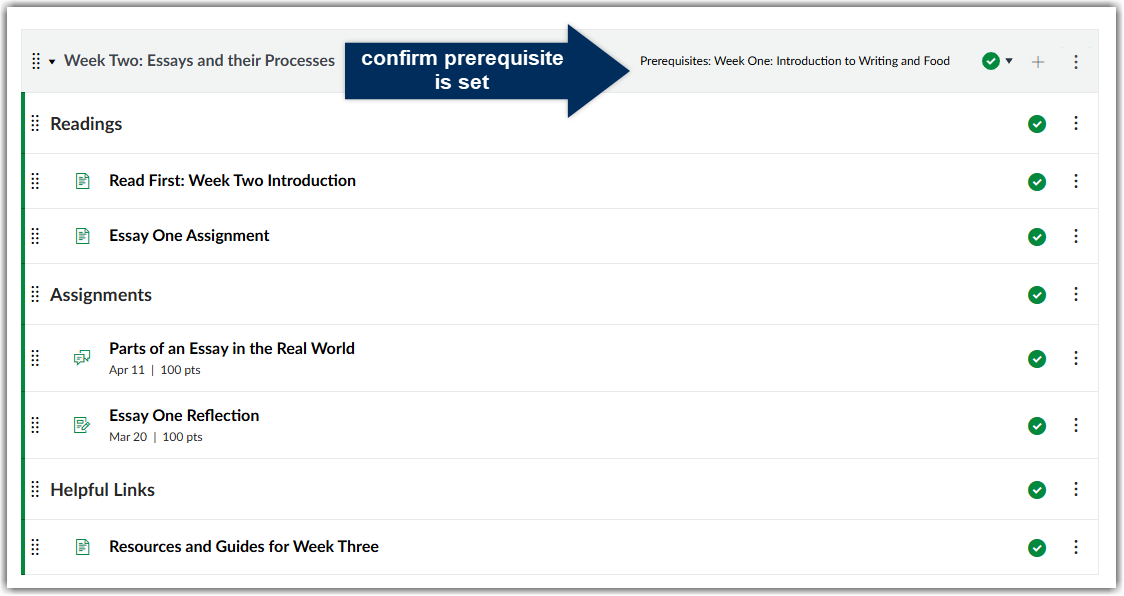
You can confirm your changes have been made in the module header.
Add Requirements to a Module
The requirements feature pertains to individual Canvas elements within a module. You can choose to allow students to complete requirements in any order, or you can require them to move through the module sequentially. A requirement to move through module items sequentially relates to the order items are listed on the Modules page. If you choose to require students to move through the material sequentially, first make sure your order is how you want it before adding requirements.
Locate the name of the module:
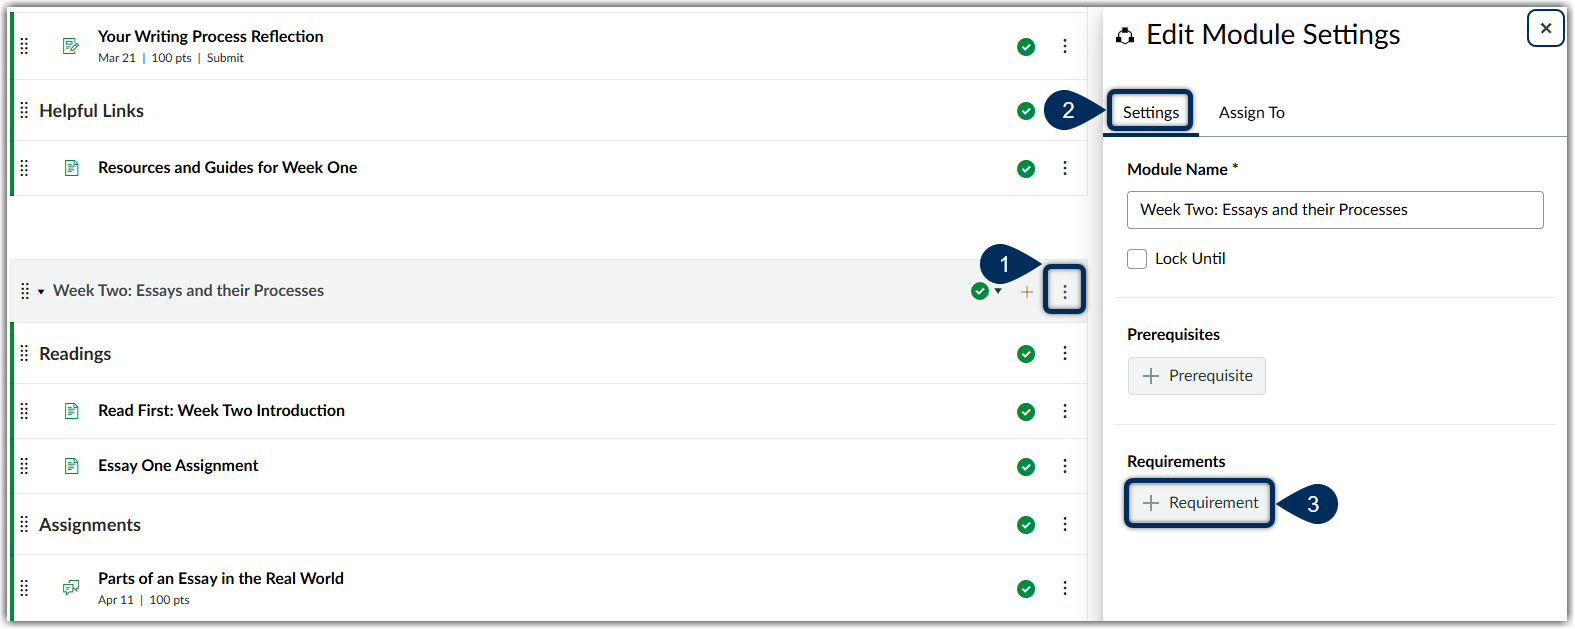
- Click the Options icon (marker 1)
- Select the Edit link
- From the Edit Module Settings tab (marker 2), click on the button to add a requirement (marker 3). Radio buttons will appear for you to decide if students should complete all requirements or one specific requirement.
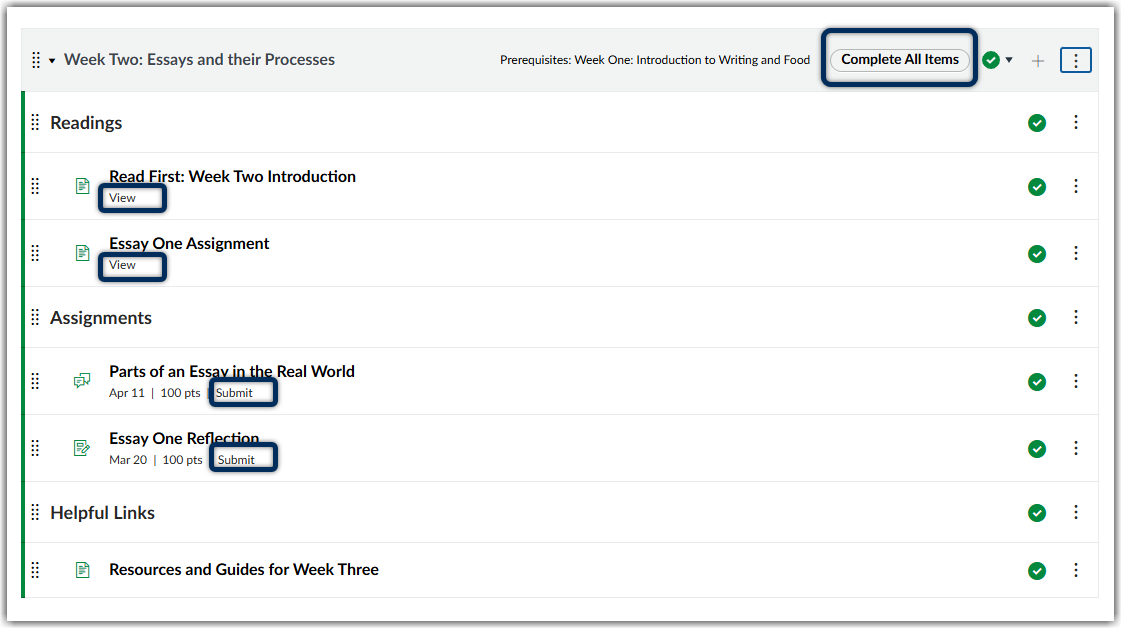
- Note: Which radio button you select will show students they must complete all or complete one of the module elements within the module heading and automatically require students to view the first item listed in the module.
- To continue to add or edit module requirements, click the Add Requirement button.
- Save changes
Depending on the module item type, you can select one of the following options to appear next to each item:
View the item: Students must view the item.
Mark as done: Students must mark the assignment or page as done before they can progress to the next item. This option also synchronizes with the student List View Dashboard and completes the item for the student. However, this behavior is only supported when the item with this requirement is located in one module. Adding the same item within multiple modules is not supported.
Contribute to the page: Students must post a reply to a non-graded discussion or contribute content to a page (make sure students are allowed to edit pages in the course).
Submit the assignment: Students must submit an assignment, post a reply to a graded discussion, or submit a quiz. (Canvas does not allow you to manually enter a grade to fulfill this requirement; a submission must be made by the student.)
Score at least: Students must meet a minimum submission score. With this option, an additional field appears where you can enter the minimum score that students must earn. This option is available for all graded assignment types, and the grade must be posted in order for the student to progress to the next module.
You can confirm your requirement settings next to each Canvas element
Lock Modules until a Specific Date
Though you can always unpublish and publish a module at a later date, Canvas allows you to set availability dates for your modules as well to ensure each module opens at a consistent day and time for students.
Locate the module you want to lock:

- Click the Options icon (marker 1)
- Select the Edit link
- From the Edit Module Settings tab (marker 2), check the Lock Until box (marker 3).
- Enter the date and time for when you would like the module to become available
Note: if you have prerequisites also set for a module that is locked, some students may still not have access to the module once it becomes available. Make sure this is clear to students in advance to encourage them to stay on pace with the course.